Wednesday, December 5, 2018

Debian and OpenMediaVault on Zyxtel NSA310 using Kirkwood U-Boot and Kernel

I've a Zyxtel NSA310 NAS laying around that sometimes does not boot.
This was an inspiration for me to try installing Debian on this kind of device.
On the NAS central web page you can find a lot of usefull information about this NAS. I'm speaking of the following page: http://zyxel.nas-central.org/wiki/Category:NSA-310


If you are planning to install Debian on a NAS device, a good place to look at is the doozan forum.

This is my brief instruction, that I've extract from the doozan forum, to install Debian and OpenMediaVault to this NAS.

Warning! Updating your NAS following this instructions may brick your device. Everything you do at your own risk.

First of all a quick investigation on this device reports that the booting problems I encountered was caused by nand bad sectorson the kernel_1 mtd.

The process consists of three steps
  1. install the u-boot
  2. install the rootfs - Debian system
  3. setup Debian: install OpenMediaVault
Step 1) install the u-boot and u-boot environment
This is the dangerous part. Updating the mtd0 partition may brick your device.
In order to install Debian on this device, we have to load the kirkwood uboot.
You can download the latest version of the kirkwood uboot for NSA310 from this doozan forum page: https://forum.doozan.com/read.php?3,12381. The one I'm using is uboot.2017.07-tld-1.nsa310.bodhi.tar.
Also download the environemnt file, which is uboot.2016.05-tld-1.environment.bodhi.tar

Remember to check the MD5 value for those files with the one provided at the doozan forum. If they match untar that files.
To makes things simpler rename the uboot to uboot.kwb and environment file to uboot.img
For me that is done with the command:
mv uboot.2017.07-tld-1.nsa310.mtd0.kwb uboot.kwb
mv uboot.2016.05-tld-1.environment.img uboot.img

We are going to install the uboot on the mtd0 partition.
To check your partitions login to the ssh shell of your NSA and run the following command
cat /proc/mtd

The mtd partitions of your NSA310 should look like this:
dev:    size   erasesize  name
mtd0: 00100000 00020000 "uboot"
mtd1: 00080000 00020000 "uboot_env"
mtd2: 00080000 00020000 "key_store"
mtd3: 00080000 00020000 "info"
mtd4: 00a00000 00020000 "etc"
mtd5: 00a00000 00020000 "kernel_1"
mtd6: 02fc0000 00020000 "rootfs1"
mtd7: 00a00000 00020000 "kernel_2"
mtd8: 02fc0000 00020000 "rootfs2"

You should backup your mtd0 partition, just in case.
To dump your partition download the uboot tools from this page https://forum.doozan.com/read.php?3,27280 extract it to a folder of your NAS, it may be a shared one, jump to that folder using your terminal, and run the following commad:
nanddump --noecc --omitoob -l 0x80000 -f mtd0 /dev/mtd0

It should have built the mtd0 file, which is your original mtd0 partition.
You should also save your actual env running:
fw_printenv > current_envs.txt
This time the current_envs.txt file is the environments variables content.

Now that you have dumped your actual configuration, before loading the new u-boot you MUST check that your device does not have bad sector on the mtd0 partion, running the command:
dmesg | grep -i 'bad'


We are going to use a usb key to load the uboot to your NAS.
FAT format a usb key. Copy the uboot.kwb and uboot.img files to your key.
Connect your NAS using an UART adapter. The baudrate you have to use it's 115200.
Boot your NAS up, you should see a message on your UART terminal asking to press any key to interrupt the boot process, so press that key.
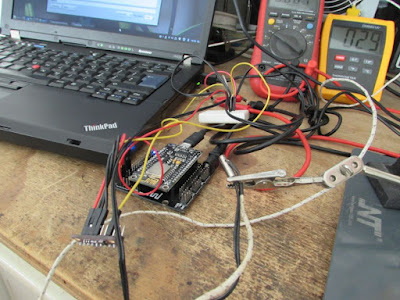
You can check RX, TX, GND ground contacts on the picture above. Also note that I've added an heat sink on the main processor, it helps.
Now you are in the u-boot command terminal.
Plug the USB key and load the kernel to ram
fatload usb 0 0x0 0x800000 uboot.kwb
If it's all ok, you are ready to erase the nand for mtd0 partition
nand erase 0x0 0x1000000
then write then new uboot
nand write.e 0x800000 0x0 0x100000
Now load the usb uboot_env
fatload usb 0 0x0 0x800000 uboot.img
and write the uboot_env
nand write 0x800000 0xc0000 0x20000
Run printenv for test purpose
printenv
and save environement
saveenv
Cross your finger and reboot using command
reset

If it reboot you can now set environments. Once again press enter to jump in the uboot terminal.
Run the following command in order to properly set environment
setenv arcNumber 4022
setenv machid
setenv mtdparts 'mtdparts=orion_nand:0x100000(uboot),0x80000(uboot_env)'
then save environement
saveenv
and reboot
reset

2) install the rootfs - Debian system
Now you can install the Debian system. This is going to be simpler then the uboot installation.
Download the latest Debian kirkwood rootfs from this link: https://forum.doozan.com/read.php?2,12096
I'm running Debian-4.12.1-kirkwood-tld-1-rootfs-bodhi.tar.bz2
My choice is to run the Debian distribution on a 8Gb usb key, and use the NSA hard drive as storage.
Format a usb key in ext3, you also can format it as ext4 with the newer kirkwood boot but to me ext3 is enough, and set the label of this disk as "rootfs".
Mount the usb key and login as root in your terminal, you must be logged as root, the sudo command is not enough.
Copy the bz2 file your have download to your key.
Jump to the usb root mount folder, and extract the file. For me it's the command:
tar -xjf Debian-4.12.1-kirkwood-tld-1-rootfs-bodhi.tar.bz2
Now edit the file etc/network/interface cause eth0 will be named enp1s0 on NSA310 as follow:
  auto enp1s0
  allow-hotplug enp1s0
  iface enp1s0 inet dhcp
If you want to set a static IP, suppose 192.168.1.20, with the gateway and main dns server 192.168.1.1 and the dns server 8.8.8.8, on a domain domain.com the those lines should look like
  auto enp1s0
  allow-hotplug enp1s0
  iface enp1s0 inet static
    address 192.168.1.20
    netmask 255.255.255.0
    gateway 192.168.1.1
    dns-search domain.com
    dns-nameservers 192.168.1.1 8.8.8.8
Plug the usb key to the NSA310 and boot it.

The NSA should boot up with Debian.
If you set your network interface as above you should found it on your DHCP leases.
You should be able to log in the ssh terminal using the default username and passwod: root for both.

One logged in renew the ssh keys by using the following 
rm /etc/ssh/ssh_host*
ssh-keygen -A
apt-get update
apt-get upgrade

And change your root password using passwd.

If you want to change the hostname edit /etc/hostname and add the new name to /etc/hosts.

To boot with systemd you can touch the /boot/uEnv.txt file and add this content to that file:
custom_params=init=/bin/systemd
Then you have to install systemd
apt-get install systemd

You are now ready to install things on your Debian NAS.

3) setup Debian: install OpenMediaVault
The most usefull software you can install in your NAS, to me, it's OpenMediaVault.
Installing OpenMediaVault in your new NAS is really simple, you just have to add the openmediavault repository package, using the command:
cat <<EOF >> /etc/apt/sources.list.d/openmediavault.list
deb http://packages.openmediavault.org/public arrakis main
# deb http://downloads.sourceforge.net/project/openmediavault/packages arrakis main
## Uncomment the following line to add software from the proposed repository.
# deb http://packages.openmediavault.org/public arrakis-proposed main
# deb http://downloads.sourceforge.net/project/openmediavault/packages arrakis-proposed main
## This software is not part of OpenMediaVault, but is offered by third-party
## developers as a service to OpenMediaVault users.
# deb http://packages.openmediavault.org/public arrakis partner
# deb http://downloads.sourceforge.net/project/openmediavault/packages arrakis partner
EOF

Then run the following come to install the openmediavault software:
export LANG=C
export DEBIAN_FRONTEND=noninteractive
export APT_LISTCHANGES_FRONTEND=none
apt-get update
apt-get --allow-unauthenticated install openmediavault-keyring
apt-get update
apt-get --yes --auto-remove --show-upgraded \
    --allow-downgrades --allow-change-held-packages \
    --no-install-recommends \
    --option Dpkg::Options::="--force-confdef" \
    --option DPkg::Options::="--force-confold" \
    install postfix openmediavault
# Initialize the system and database.
omv-initsystem

Now you should be able to login to the web interface of your NSA310 openmediavault using the default username and password, that are admin and openmediavault.

From the OpenMediaVault panel you can customize your NAS.
You can format and mount your hard drive, and setup your sharing.
You can find a lot usefull information on the openmendiavault documentation page https://openmediavault.readthedocs.io/en/latest/

If you like me used an external USB key for your primary hdd, you can set your storage disk to spin down. I was not able to make my disk spindown in time using hdparm, so I'm using hd-idle. In order to use it I've got to compile it. Here you can find the hd-idle 1.05 armel package I've compiled:


To install hd-init copy the package on your device and run
dpkg -i hd-idle_1.05_armel.deb
Remember to disable the spindown on hdparm and on Storage/Physical Disks openmediavault settings.
Now you can edit the file /etc/default/hd-idle
Suppose you want to disable spindown for all disk except sda, and set a 10 minutes spindown for sda, that file should look like:
START_HD_IDLE=true
HD_IDLE_OPTS="-i 0 -a /dev/sda -i 600"
To start hd-idle at boot add the following command on System/Scheduled Jobs openmediavault setting:
service hd-idle start
use options reboot and user root.


Notes
  • read risk disclaimer
  • excuse my bad english


Saturday, November 3, 2018

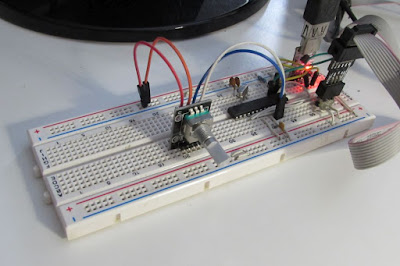
An interrupt free quadrature decoder library for rotary incremental encoders

- updated to version 02 -


A rotary incremental encoder, also called a shaft encoder, is an electro-mechanical device that converts the angular position or motion of a shaft or axle to analog or digital output signals (https://en.wikipedia.org/wiki/Incremental_encoder).

That kind of encoders may use mechanical or electronic sensors to read the rotation steps.
They have got two output channel, let's call that A and B.
When the rotary move at a fixed speed, they produce a quadrature-encoded output, that means the duty cycle of each pulse is 50%.

This library is an implementation of a quadrature decoder, that is a device that reads A and B channel output from an encoder and produce a direction and step count signals.

Rotary encoders may be of two types, one for hand use, with fixed rotation point that the user can feel, other for motors or rotative devices, with no rotation fisical step. This driver does not work well with rotary encoder with fixed point on step change, however that types of encoder is not common.


To decode the encoder status we have to build a state machine that implements the quadrature decoder table you find below.

Once that table is implemented, to avoid step missing we need to read the channels status with an appropriate speed. That speed might be 127 times more than the channels changing speed. For a manual rotary encoders 1ms reading time is enought, it means that we can read the channel change status at the frequency of 1kHz/127 = 8Hz.

This library was developed on Eclipse, built with avr-gcc on Atmega8 @ 1MHz.


Changelog
  • 02: encoders process function can be called inside an external timer to prevent interrupt disabling, fixed initialize function problem
  • 01: first release

Code

Notes
  • read risk disclaimer
  • excuse my bad english

Monday, October 8, 2018

Switch debounce library


Contact bounce (ref. https://en.wikipedia.org/wiki/Switch#Contact_bounce) is a common problem with mechanical switches and relays. Switch and relay contacts are usually made of springy metals. When the contacts strike together, their momentum and elasticity act together to cause them to bounce apart one or more times before making steady contact.

You can find below a sample of a bouncy button press. You can see the typical ripples of the bounce button press.


If you use a microcontroller to read the button status, depending on the speed you read the button it may seems that it is pressed many times, even if it is pressed once, and that's should became a problem.

To solve this issue there are two way:
  • Hardware
  • Software
The usual hardware way is to build a low pass filter. Sometimes you will find a Schmitt-trigger after the RC filter, to avoid hysteresis.
The limitation of the hardware way is that you have to implement it on your board, to select the correct component values, and to use more hardware.
A software solution may help us, providing a malleable way to solve this issue.

An interesting reading about this topic is the Jack Ganssle's article "A Guide to Debouncing" http://www.ganssle.com/debouncing.htm

Also, I suggest you to take a read at the two articles series by Elliott Williams, he explains this issue very well and also propose a few hardware and software solutions:
The library i propose here is of course a software solution, developed on ATmega microcontroller but portable to many other micros.

It is based on the Trent Cleghorn code you can find it here: https://github.com/tcleg/Button_Debouncer that is an implementation of the Jack Ganssle article posted above.

What it pratically does is to read the button status a bounch of time, and set the final status button only if all the times the reading was done is the same.
Ganssle by experiments analyse that a value from 10ms to 20ms is enough to consider stable a button output. In my example I read 8 times the button each 10ms, but one can also use less time without problem.

The library works by byte status, it means it can debounce multiples of 8 buttons at time, one for each bit. Therefore a 2 byte implementation can debounce 16 buttons.

There are function for to get the press and release button, and the current status. Press and release functions also are implemented in such a way that one can read that function and arm back that function status only after it is read.


Code

Notes
  • read risk disclaimer
  • excuse my bad english

Monday, September 3, 2018

MCP4725 DAC AVR ATmega library


In this post I present an AVR implementation for the MCP4725 DAC.

The MCP4725 DAC is a pretty common and cheap single channel 12 bit buffered voltage DAC, it also has an onboard EEPROM.
To drive this chip we can use I2C interface.


The ATmega8 used for my implementation has an embedded I2C interface, so we just can use that interface.
The selected I2C library is the one proposed by Peter Fleury, you can find it here: http://homepage.hispeed.ch/peterfleury/avr-software.html

To library provides simple functions to set the output channel of the IC by using raw value or a voltage value.


The voltage output of this chip is limited by his voltage input, that is 2.7v to 5.5v, and the current allowed at the output pin is 25mA.
If you need more current, or more voltage, you can use a combination of opamp and power transistors.

Up to 8 MCP4725 can be driven using this library, the IC address has to be selected using the hardware pulldown selector.

This project has been developed and tested on an ATmega8 running at 8Mhz.

An example program is provided in order to help the library usage.


Code

Notes
  • read risk disclaimer
  • excuse my bad english

Saturday, August 4, 2018

4pin hall sensor adapter board


Hall Sensor are pretty common components. Most of the time one will find 3 pin Hall Sensor. But there are time that one can find a 4 pin hall sensor.
Those kind of sensor is called dual-channel.


They basically have GND and VCC input, then two output. When a magnetic field is applied a small voltage happears between the two output, reversing the direction of the applied field will reverse the voltage output.
If you want to use that sensor as a switch you have to build a comparator circuit that ouput a signal level.
As example, in old cdrom brushless motor those kind of hall sensor are common. To use an old cdrom as a rotary encoder, or to connect the cdrom to a brushless sensored driver, you need to convert the output of the 3 hall senso monted on the cdrom in a logic signal output.
The circuit proposed here use a differential comparator to achieve this goal.
Here you can find the schematic and a board design for this circuit, in Eagle format.


Schematics & Board


Notes
  • read risk disclaimer
  • excuse my bad english

Sunday, July 1, 2018

DentneD: an open source Dental Practice Management Software

DentneD is a Dental Practice Management Software.
It's a complete open source solution to manage you clinic.


You can trace your patient, treatments, scheduling appointments, doing reports, and billing managment.
It features a client-server architecture.

Features:
  • Doctors records, manage more than one dentist
  • Patient records
  • Full patient medical records
  • Patients attachments and notes management
  • Billing management, with invoices and estimates
  • Treatments lists
  • Scheduling agenda
  • Customizable reports
  • PDF output templates
  • Cloud backup scripts
  • Calendar web interface
  • Client-server architecture, access by multiple computer at the same time
  • Multilanguage
  • Send appointments reminder
  • Password form protection
  • Windows service for additional features

Requirements:

  • Microsoft Windows with .NET framework 4.5.2 or later
  • Microsoft SQL Server 2012 or later
  • For web app: PHP 5.3 or later

Code & Releases


Notes
  • read risk disclaimer
  • excuse my bad english

Wednesday, June 6, 2018

TriNegistor, a Triple Negistor oscillator noise box

-- ref. 2010


This box I present here is a triple negistor oscillator. This is basically a noise box I use to make sounds.


The orignal schematics cames from Charlie Barth trinegistor, you can find it here http://moosapotamus.net/trinegistor.html.


I just change some components and add a few switch to his schematics.
First of all, what's a Negistor? It's a a NEGative dIfferential resistance oscillaTOR, it's an oscillator built using his NDR effect. The negistor I use it's build using a 2N2222A NPN transistor wired in reverse mode. Please find more information here: http://www.keelynet.com/zpe/negistor.htm.
The tri-negistor is built putting in series three negistor oscillator.


Notes
  • read risk disclaimer
  • excuse my bad english

Wednesday, May 2, 2018

UV Sensor ML8511 AVR Atmega library


Ultraviolet (UV) is an electromagnetic radiation with a wavelength from 10 nm to 400 nm.
The ML8511 is an ultraviolet sensor that output an analog signal correlated to the amount of UV light detected. By datasheet the sensor detects wavelength from 280nm to 560nm.


Here I've implemented a driver for AVR Atmega, portable to other microcontrollers, that correlates the sensor output to light intensity, it also computes the UV index based on the sensor input.
The ultraviolet index or UV index is an international standard measurement of the strength of sunburn-producing ultraviolet (UV) radiation at a particular place and time. It is a linear scale, with higher values representing a greater risk of sunburn. The purpose of the UV Index is to help people effectively protect themselves from UV radiation.
Not all the energy of the UV spectrum has the same "damage" power, due to this the power spectrum is multiplied by a weighting curve known as the erythemal action spectrum, and the result integrated over the whole spectrum.

The correlation function I propose here is derived by the datasheet graph of "Output Voltage over UV intensity".


From this graph we can get the correlation function. This graph is clearly a linear function. We have Output voltage on the y axis and UV intensity on the x axis.
Because we want to obtain the UV intensity using the voltage that we can read from the sensor, we are going to flip the graph.


Once we have flipped the graph we can now get the point from the graph using a tool like WebPlotDigitizer.
We can now use liner regression technique to obtain the function we need to convert voltage output to UV intensity.
Also notice that this graph has four functions for 75degree, 25degree, -5degree, -25degree temperature condition.
If we perform linear regression on points of that function we get 4 correlation functions.

@75deg UV mW/cm2 = 8.158154634V -7.77772054
@25deg UV mW/cm2 = 7.9816914V - 7.921745308
@-5deg UV mW/cm2 = 7.853758854V - 7.934095316
@-25deg UV mW/cm2 = 7.743732684V - 7.978602568

Note thate the accuracy of this method depends on the accuracy of your point extraction.

More in general we can say that the correlation function looks like this:


If we are going to use this sensor under different thermal condition we can simply interpolate beween those function to get the correlation function slope "s" and intercept "i".

Also, that graph is for a wavelength of 365nm.
We may find the responsivity function of this sensor on the datasheet. Responsivity measures the input–output gain of a detector system. We can use again the WebPlotDigitizer to find points from the "Responsivity Characteristics" curve.


We may notice that for the 365nm light the responsivity is 1. It means that on that light condition the sensor correlation function we have seen before has a gain of 1.
If we suppose to apply a filter over the sensor UV detector that passes only just a single wavelength we can adjust the correlation function according to the gain of the sensor responsivity. That function is inversally proportional, so if our sensor has responsivity 0.3 on a 400nm wavelength, the correlation function have to be multiplied by 1/0.3, cause the voltage output measured is 0.3 times less than the voltage output at 365nm.
We are not going to use this most of the time, because we are going to use our sensor to measure the total UV intensity.

Now let's take a look at the UV index.
The UV index is defined as:


The function that defines the susceptibility of the human skin to sunburn (erythema) and of generalised DNA damage due to UV radiation is called erythema function, you can find it below.


Given the erythema function w(lambda)


And the irradiance spectrum I(lambda), we may note that the 1/25 coefficients makes the UVI dimensionless.

We have tell that the sensor we are using measures ultraviolet intensity between a range.

We are going to consider just:
  • Ultraviolet A (UVA): wavelength between 315nm and 400nm
  • Ultraviolet B (UVB): wavelength between 280nm and 315nm
We can assume a fixed ratio between UVA and UVB because we know that more than 95% of the ultraviolet radiation that reaches the Earth's surface is the UVA. So we can say


And, because this sensor measure just UVA and UVB, we can also say


and


Our sensor gives us a voltage output.

To make math simpler we can average the erythemal function w(lambda) for UVA and UVB as follows:


Now, we can take a look to the UV index function, we notice it as a mW/m2 index, so we have to covert the correlation function to mW/m2


Then we can substitute things in there:


We finally get


As example, if we consider a fixed temperature of 25degree, we get:


If you have a calibrated UV index meter you can correlate that function with the meter and adjust the offset of this equation.


Where o is the offset calculated using the equation


Reference: "Ultraviolet Sensor IC with Voltage Output by ROHM and LAPIS semiconductor". Note that on that paper they use a different method of correlation to find out the correlation curve.

In conclusion we have take a look at this UV sensor, trying to correlate the sensor output to the UV intensity, eventually considering also the environment temperature.
We have then looked at the UV index function, which is fairly usefull as an index for UV impact on health.

This library have been developed on an ATmega8 running at 1Mhz.


Updates

  • Robles Pedro makes me notice a typo error in the UVI=10.463V-10.4076, the previous blog post has a typo error on that formula. So thank you Pedro.


Code

Notes
  • read risk disclaimer
  • excuse my bad english

Monday, April 2, 2018

A web configurable ThingSpeak logger, build on AVR ATmega328

ThingSpeak is an open source Internet of Things (IoT) application and API to store and retrieve data from things. It is an on-line database service allowing developers to connect sensor-derived data (e.g. energy and environment data from objects, devices & buildings) to the web and to build their own applications based on that data.

This embedded platform is a modular and configurable ThingSpeak data logger, built on an ATmega328 micro, usefull to send datapoints to your ThingSpeak feed.


This project is an update to the Xively logger presented here: http://davidegironi.blogspot.com/2014/12/a-web-configurable-xively-logger-build.html.
LogMeIn will retire this legacy version of Xively, that is Xively Personal, on January 15, 2018. For this reason I've made an update to my previous logger in order to update my products logger to ThinkgSpeak.

If you are going to use this logger, please read the linked post link about the Xively version. This version is almost identical to the Xively one, just a few things has been changed to meet the ThingSpeak RESTful API.

The POST method it is used to send data to Thinkgspeak.
Even this version has a network interface you can use to configure the Ip address and connection mode, and your ThingkSpeak API key and feed number.

If you are using the priouse version you have to update the main.c and main.h code files, and the _xivelygetdata methods of you sensors implementations, this function has been renamed to _thingspeakgetdata. Also, all the previous reference to xively has been renamed.

The hardware used is an ATmega328, running at 16Mhz, for this reason one can also use an Arduino board. The network board used is based on the EC28J60 IC.


Code

Notes
  • read risk disclaimer
  • excuse my bad english

Sunday, March 4, 2018

An AVR ATmega R/C control signal reader - Method/02


The Radio Control (R/C or RC) is the method of controlling remote devices using radio frequencies.
Most of the time the RC signal uses RC servo signals.
Servo signal is a square PWM signal, usually with a period of 20ms and a duty time between 1ms and 2ms. More info on the wikipedia page here: https://en.wikipedia.org/wiki/Servo_control.

This library implements a method to read an RC signal and eventually map this to a 0..100 number.

There are a few methods of performing this task of course. Another alternative method i propose can be found here: http://davidegironi.blogspot.com/2017/04/an-avr-atmega-rc-control-signal-reader.html


It's developed on an ATmega8 running at 16Mhz.
It makes use of the external interrupt PIN and a timer to count the duty period time.
It's customizable to fit the user preferences. Configuration can be found in rcin2.h header file.
This is slighly less accurate than the Method/01 proposed in the link above, but it uses less resources due to the slower timing needs.
Theory of operation: each time a rising edge interrupt it is raised the timer counter is stored, When the falling edge happens the difference between the actual timer counter and the stored one it is used to compute the duty time.
Input PIN is INT0.
The RC signal it is measured, eventually filtered using an exponential moving average filter, and then mapped to a speed value from 0 to 100.


Code
Notes
  • read risk disclaimer
  • excuse my bad english

Monday, February 5, 2018

esp8266/Arduino 74HC4051 library


The 74HC4051 is a high-speed Si-gate CMOS device and is pin compatible with Low-power Schottky TTL (LSTTL).

The 74HC4051 IC can be used to expand the single ADC input port of the ESP8266, to 8 ports.
The ESP8266 comes with a 10bit ADC, 0 to 1V, the datasheet doesn't tell much more than this about the internal analog converter.


The output pin of the 74HC4051 is controller by 3 pins, by setting those pins high or low an analog input of the 74HC4051 is selected.
It can be driven by the same 3.3V that powers up the ESP8266.


This library was developed on Atom+PlatformIO, compiled esp8266/Arduino.


Code

Notes
  • read risk disclaimer
  • excuse my bad english

Tuesday, January 2, 2018

esp8266/Arduino NTC library


A thermistor is a type of negative coefficient resistor whose resistance is dependent on temperature, more so than in standard resistors. The resistance of a NTC Negative Temperature Coefficient thermistor (https://en.wikipedia.org/wiki/Thermistor) decreases as temperature rises. The Steinhart-Hart Thermistor Equation or the Beta Model Equation can be used to correlate the thermistor resistance to temperature to which the sensor is exposed.

The library implements the Steinhart-Hart Thermistor Equation or the Beta Model Equation to convert adc value read from analog input to temperature.
It output temperatures in Celsius or Fahrenheit.

The ESP8266 comes with a 10bit ADC, 0 to 1V, one can use the ESP8266 ADC for this library.
Suppose you are going to the internal ADC, and that NTC is going to be used between -20 and +100 degree Celsius. The NTC resistance by datasheet at -20 degree is 100k, and at 100 degree 100. To evaluate the pullup resistor you have to consider that the Voltage output at the ADC pin will be
Vout = Vpullup*(Rntc/Rntc+Rpullup)
We have to consider the max Vout, that comes from the max resistance given by the NTC
Voutmax = Vpullup*Rntcmax/(Rntcmax+Rpullup)
We have to chose a Rpullup such that Voutmax < 1V, so:
Rpullup = Vpullup*Rntcmax/Voutmax - Rntcmax
Subsitute with the sample NTC we are considering:
Rpullup = 3.3*100000/1 - 100000 = 230000.
A 220k resistor would do the job.

In the example i propose here I am using a ADS1015 12 bit analog to digital comparator, that is much more accurate than the internal ESP8266 ADC.
I am using the Adafruit ADS1X15 library for this IC, on top of that library I've build an helper to just convert the ADC raw value that comes from the ADS1x15 to a resistance or voltage value.


Once we've acquired the NTC resistance we can use the Steinhart-Hart Thermistor Equation or the Beta Model Equation to convert the resistance value to temperature.

A digital iir filter is implemented to remove unwanted reading errors.

This library was developed on Atom+PlatformIO, compiled esp8266/Arduino.

Code

Notes
  • read risk disclaimer
  • excuse my bad english